SINTELLI as Circular Knitting Machines Manufacturer would like to share resource, blog, latest technology, pattern and news related to the knitting industry to every reader.
People love procrastinating but are terrible at it!
Did you know?
StudyMode found that 87% of students procrastinate on their homework, choosing to watch TV or use social media instead. Moreover, 2016 saw internet users around the world spend 118 daily minutes on social media.
Now, we have nothing against watching TV or “liking” funny videos on Facebook.
But think about it:
Would you procrastinate and end up feeling guilty (with red eyes)? Or would you rather “waste” time and feel better and healthier?
If you chose the latter, enter handcrafting!
Handcrafting lets you kill time while creating something special. And as you’ll see in a bit, crafts like crocheting and knitting benefit one’s mind and body, too.
Why Handcrafting? The 4 Surprising Benefits Of Crafts
NOTE: Add an image here. Maybe a collection of handcrafting images with a “?” right smack in the center

Better Mental Health
Here’s an interesting tidbit:
Crafts such as knitting can make you happier according to a study published by The British Journal of Occupational Therapy.
The study involving over 3,500 knitters saw 81% of the participants feeling happy after a knitting session – and more than half even reported feeling “very happy!”
For Sarah Huerta, knitting helped her recover from post-traumatic stress disorder and extreme anxiety following his brother’s sudden death in 2004.
The researchers believe that handcrafting encourages the brain to release dopamine, our brain’s natural anti-depressant. And any time we can stimulate the release of dopamine without the use of medicine, the better off we’re going to be.

Great Bonding Time With Kids & Family
Are you looking for more reasons to bond and spend time with your young ones? Look no further. Arts and crafts can bring the entire family together – and bring out the best in your child!
Research involving 50 child development experts and 300 moms in the United States found that connecting with your child through crafts help them develop mental skills necessary for success later in life.
Visual processing skills like pattern and spatial recognition top the list. Not to mention arts and crafts can help accelerate the muscle development in hands and fingers while improving fine motor skills.

Never Run Out Of Gift Ideas
You can kiss your gifting woes goodbye with handcrafting with new craft ideas.
So is one of your besties expecting a baby? Welcome the little one with a DIY extra-large reversible receiving baby blanket.
If you want to impress your girlfriend with a practical yet attractive gift, you can surprise her with a Macrame back bra. Or, you can whip up French Vanilla candles to treat your partner to a better-smelling home.
You’re guaranteed to find unique DIY handcrafted gift ideas whatever the occasion – whether it’s Christmas, Halloween, or Thanksgiving.

Make Money
The handicrafts industry is growing – and there’s no shortage of proof.
Etsy, the online handmade goods marketplace, enjoyed a 25% increase in active buyers and 19.4% in active sellers in 2015. Art and coloring supplies saw a 7% increase in sales in the same year. And according to global market research company Technavio, the global handicrafts industry is expected to grow by 12% annually from 2015 to 2019.
Making money may not be a priority when picking up a hobby. However, knowing that a new craft can be a source of side-income (or even help quit your day-job) is always nice!
Let’s Dive In, Shall We?
Handcrafting can benefit you (and those around you) in a lot of ways.
If you find the perks convincing, the following sections will introduce you to 9 fun-packed and easy crafts for beginners and grown-ups.
And with links to simple DIY projects and recommended resources, you’ll be creating unique, handmade items in no time.
1. Painting By Numbers

Painting by numbers is as simple as it sounds.
An image is divided into free-form shapes, each tagged with a number representing a particular color. One only needs to paint each shape with the right hue, and voila! The colorless picture turns to a finished painting.
The simplicity of this craft often draws ridicule. “Artistic” folks call the approach uncreative and mechanical. But don’t mind the haters! Painting by numbers is a great way to learn building images using different shapes of color.
The beginner-friendly craft also lets you recreate beautiful works of art – minus the decade-long training. And while painting by numbers won’t replace real artworks, the former gives you a taste of how artists feel creating a colorful masterpiece.
You only need basic art supplies to paint by numbers:
- A printed outline of an image
- A right-sized brush
- And paints with the right colors at the right amounts
A paint-by-numbers kit will include all of the above. When shopping for one, however, choose the kit with acrylic paint. It dries faster than oil paint and can be easily washed with water.
DecoArt – A Simple Paint-By-Numbers Floral Design
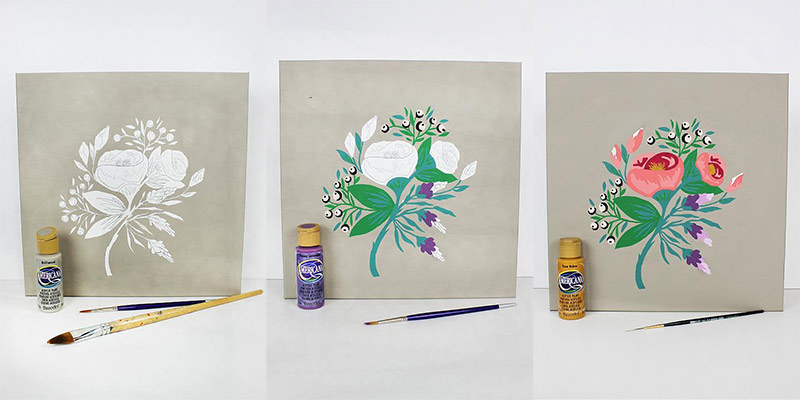
Want to start with an easy painting project? DecoArt will get you going in the right direction. The project uses 13 different colors and other tools including a couple of brushes and various types of paper. But don’t let the number of art supplies necessary intimidate you. Get everything ready, and adding to your living room with a floral painting becomes as easy as 1-2-3!
The Ambitious Procrastinator- How To Make A Paint-By-Number From A Photo
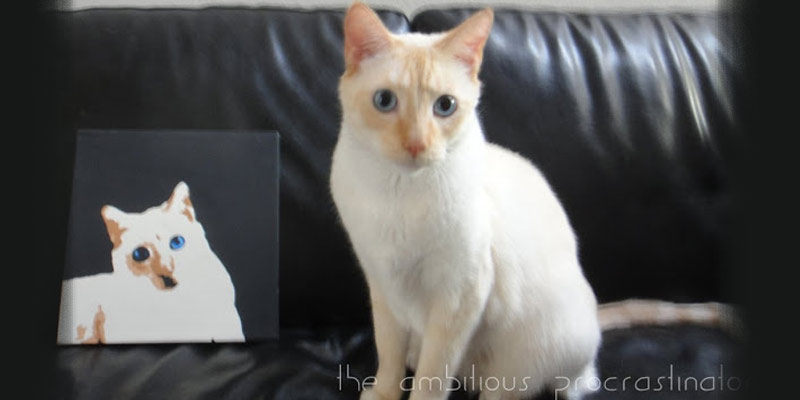
Nikki, “The Ambitious Procrastinator,” loves the paint-by-number ideas on Pinterest, but finds the entire collection lacking. What if you want to turn a family photo to a wall painting? If you’re asking the same question, this DIY guide will show you how it’s done. The guide also a free online photo editing tool to posterize any photo.
Sara In Shanghai – DIY Paint-By-Numbers Guide
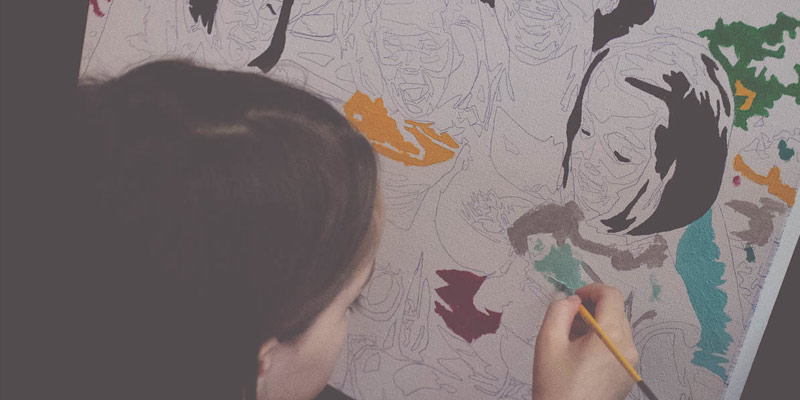
Once you’re comfortable painting by numbers using kits and patterns, give this project from Sara a try. The author dreamt up the fun summer school project in spring, and found it was easier than expected! The DIY project uses Adobe Photoshop (leading to more accurate colors) and needs a bit of freestyling and creative decision-making. But don’t worry, this painting project doesn’t require a Picasso to pull it off. 🙂
2. Crocheting

You can knit or sew using a machine. If you want to crochet, however, you have to do it by hand!
But don’t worry:
Crochet isn’t as complicated as it looks.
Beginners take to crocheting with ease – and for good reasons. For starters, the craft uses a single hook and only has one active yarn loop. And should you make mistakes along the way, you don’t have to start again from square one to fix the hiccups.
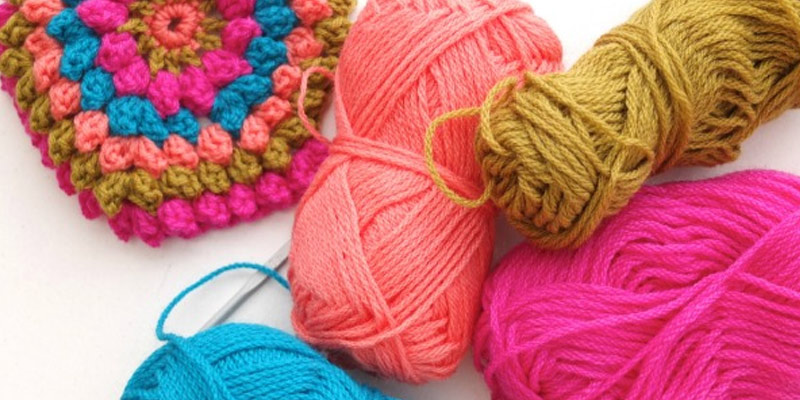
Here are the tools you need for crocheting:
- A crochet hook. Make sure to pick one that suits the yarn and pattern. A hook too small makes working with the yarn harder. And a hook too big leads to limp-looking stitches.
- The right yarn for the project. Certain patterns need specific yarns, and you want to stick to the recommended category.
- A small pair of scissors with a sharp point. Those are tailored for crafts like crochet.
And do read this post by Anneliese over at Tip Junkie. Her guide will help you find the right supplies for your crochet project. After shopping for supplies, check out the following resources and DIY crochet ideas to get started.
Instructables – How To Crochet For Beginners
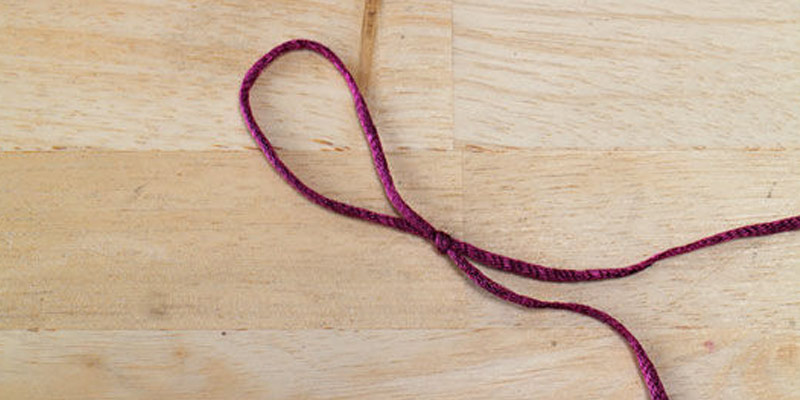
This Instructable from Leigh Dudenhoeffer is a must-read for every beginner. The guide shows everything you need to know to crochet in 8 steps (complete with GIFs) – from tying a slip knot, starting a chain, to cutting the long side of the yarn.
Always Rooney – Beanie Crochet Pattern
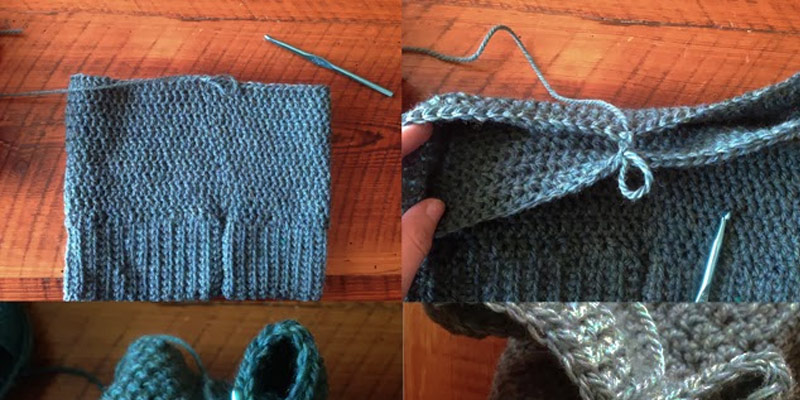
A beanie can come handy, especially for the ladies. Don’t feel like fixing your hair this morning? Wear a beanie to cover the top half of your head. Earphones always slipping out? Keep the pair in place with a beanie. Want to pull off that trendy hipster look? The hat can get the job done. Learn how to make your beanie with this easy-to-follow tutorial from Courtney of Always Rooney.
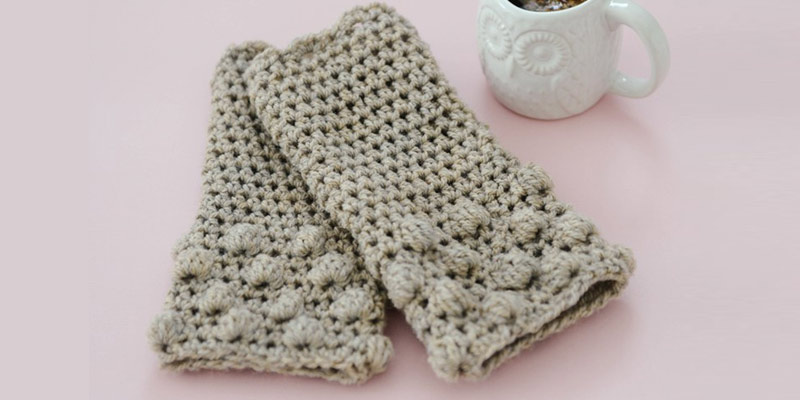
My Poppet – How To Crochet A Popcorn Stitch
The popcorn is a rounded and compact stitch that stands out from the fabric. Sure, the stitch uses a lot of yarn. But the thick texture is excellent for protecting surfaces. If you already know how to double crochet, you just need to learn one more step to make a popcorn stitch. This video tutorial from Cintia of My Poppet shows you how.
Yvestown – The Principles Of 3D Crochet
You only need to follow 3 simple steps to start crocheting balls – and they’re in this guide from Yvestown. And to put your newly acquired 3D crocheting skills to good use, work on the two DIY projects included. You’ll have something to keep your hands warm and your pillows gorgeous.
3. Knitting

Knitting creates multiple loops of yarn to create fabric. Sure, it may look and sound complicated, but getting started with the craft is easy. And the benefits are manifold.
Knitting is always a great excuse to bond with your grandma. Not to mention you can take your project anywhere and work on it while multitasking.
Are you waiting for an appointment? Or taking a long-haul flight? Whip out the yarns and needles and knit away! Do you love watching TV or daydream a lot? No problem. You can knit while you’re at it.
But the best of all:
Knitting enforces mindful meditation, which is good for one’s mental health! British physiotherapist Betsan Corkhill even founded an organization that promotes knitting as a therapeutic practice.
If you’ve never knit before, this page from About.com will show essential knitting skills like making a slip knot, forming a knit and purl stitch, as well as casting on and off. After an introduction to the basics, you want to make sure you have the right supplies for the craft.
Here they are:
- A basic, inexpensive yarn
- A dozen needles for good measure
- A pair of scissors
- And a crochet hook
Be warned, however:
Don’t go nuts with knitting supplies and buy everything that tickles your fancy. Many aspects of knitting depend on personal preference. And if you panic-buy supplies, you’re likely to end up with stuff you will never use.
And one more thing:
Stick to a basic and inexpensive yarn if you’re starting out. Fancy and embellished yarns are attractive indeed. But they are not beginner-friendly.
Purl SOHO – Hudson’s Bay-Inspired Crib Blanket
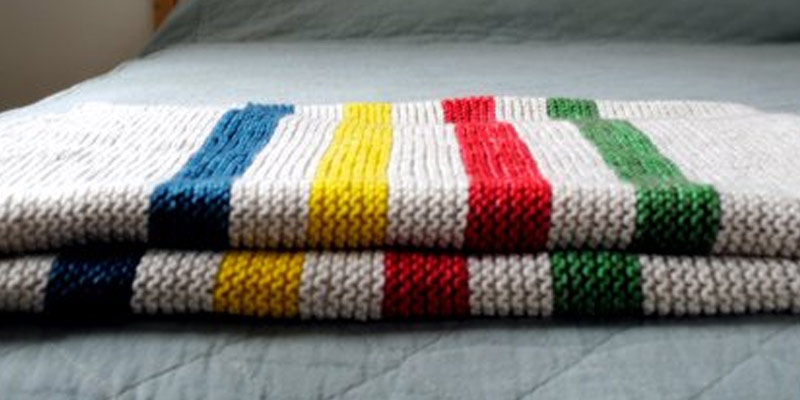
If you’re a fan of the warm and insulating Hudson’s Bay blanket, you’ll love this DIY knitting project! The fine ladies behind Purl SOHO turned the original to a handmade piece made for the little ones. But don’t worry if there’s no baby around. Grown-ups will love this Hudson’s Bay-inspired blanket, too.
Things For Boys – Knitted Baby Uggs
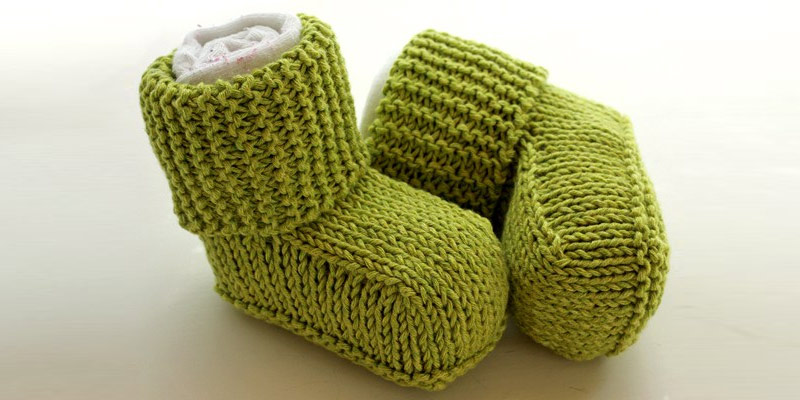
Want to add a modern, handcrafted twist to the usual baby boots? Check out this free pattern from Things For Boys. The booties are quick to make and are knit in one piece. No seams or ribbons to worry about. The knitting method used is a little tricky, but the detailed PDF guide will help you find your way.
The Sitting Tree – Knitted Coffee Cozies Tutorial
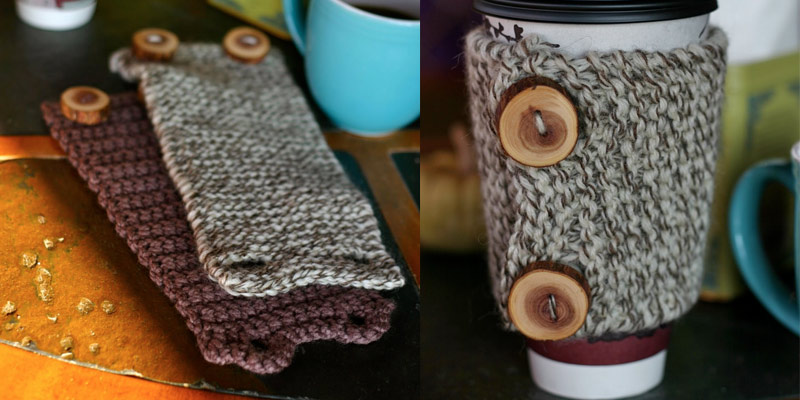
If you like your cup of joe served hot but find the cup impossible to hold, this tutorial is for you. The Sitting Tree shows you how to knit a lovely coffee cozy – and they even have a crochet version. It’s ideal for personal use and can be the perfect gift to a caffeine-obsessed friend.
4. Cross-Stitching

Cross-stitching is one of the oldest forms of embroidery. And as its name suggests, the craft uses x-shaped stitches to create images and pictures. Cross-stitching uses patterns just like painting by numbers. It’s a simple craft that beginners can quickly pick up, and it can get addictive, too!
If you need a quick introduction to basic cross-stitching techniques, check out this post from Mochimochi Land. The guide will show you how to create a simple x-stitch, which is the building block of cross-stitching.
The tools you’ll need for cross-stitching are:
- Needles are a must-have for cross-stitchers of any skill level. Shop for affordable yet reliable needles such as those made by Milward Embroidery. They’re comfortable to use, guaranteeing a better stitching experience.
- Fabric scissors are next on the list. Grab one that’s about 7 to 8 inches long and built to cut cross-stitch fabric like aida cloth or linen.
- Embroidery scissors are smaller than fabric scissors and sport a pointed tip that curves upward. You need a pair so you can cut threads close to the fabric without piercing the latter.
- You also need a hoop or frame to stretch the fabric when stitching. You can go hoop-free, but doing so also runs the risk of puckering the fabric due to uneven tension.
Now that you already know how to form an x-stitch and have the supplies needed, it’s time to gain some hands-on experience with some easy-peasy DIY ideas.
Kollabora – “Make It Rain” Giant Cross Stitch
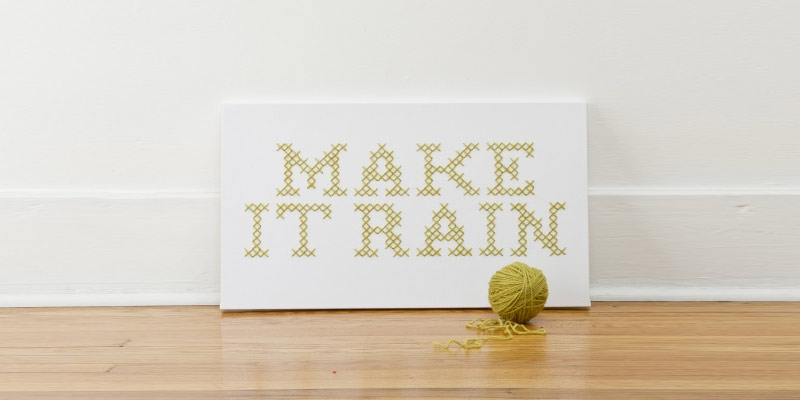
Want a hip-hop inspired decoration that’s a breeze to make? Check out this beginner-friendly “Make It Rain” cross-stitch pattern. Created by Kollabora and art director Jessica Decker, this is an excellent addition to any room or office. Make it rain!
Paper N’ Stitch – Stitching A Pendant Necklace Together
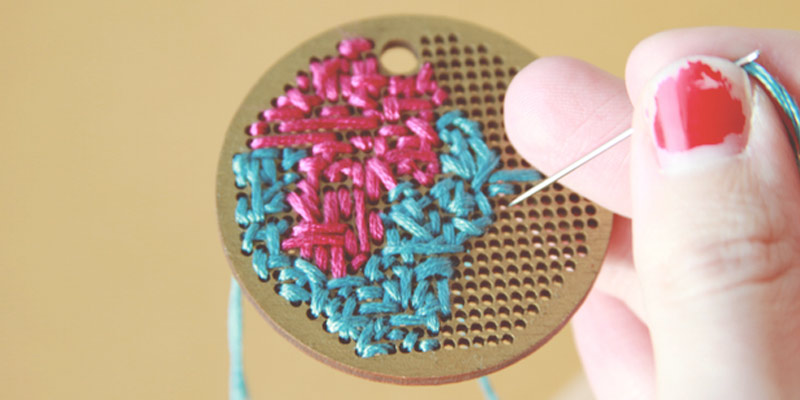
This pendant idea from Brittni of Paper N’ Stitch suits cross-stitchers who know the basics. And the necklace makes for a lovely gift whatever the season or occasion! The stitching project is easy to follow and gives you enough room to add your personality.
Jezebel – How To Make Your Very Own Naughty Cross-Stitch
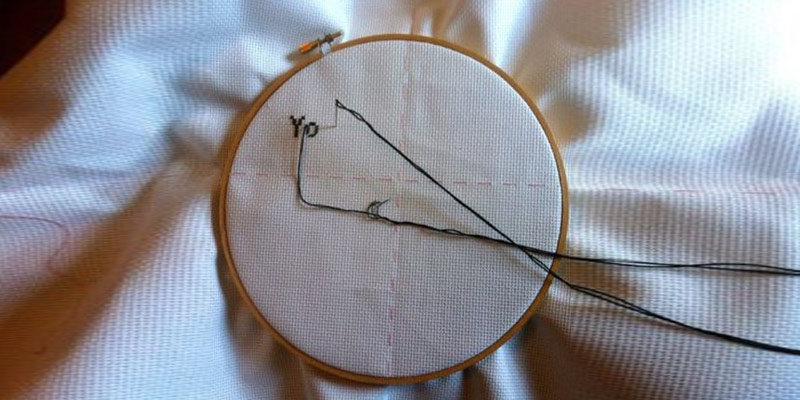
The combination of embroidery and naughty quotes will never go out of style! And this DIY guide from Jezebel shows you how to create one. If you’re a complete beginner looking for a simple (yet humorous) introduction to needlework, you will appreciate the detailed instructions as well as images sprinkled throughout the post.
5. Macramé

Macramé has ancient roots. Many believe the craft was originated by Arab weavers during the 13th century and was spread by globe-trotting sailors. Instead of using weaving or knitting techniques, macramé uses knots to make decorative items.
The 1970s saw macramé rise to popularity. It made its way to groovy apartments as functional hanging decor. Macramé even dominated fashion in that era, with chokers, belts, and bags sporting the fancy knots of the craft.
Macramé today isn’t as widespread. But it’s still a fun and relaxing way to pass the time. And once you get a good grip on it, you can create just about any accessory or style of jewelry.
The essential tools for macramé include:
- A roll of hemp cord or twine
- A pair of scissors for cutting cords
- And safety pins for keeping stuff in place
You may need more supplies depending on the complexity of a project. Advanced DIY macramé ideas may require a project board, rings to hold mounting cords, and even crochet hooks. Fortunately, the DIY ideas below are simple and need only the most basic tools and supplies.
Relevé Design – How To Make A Macramé T-Shirt Throw
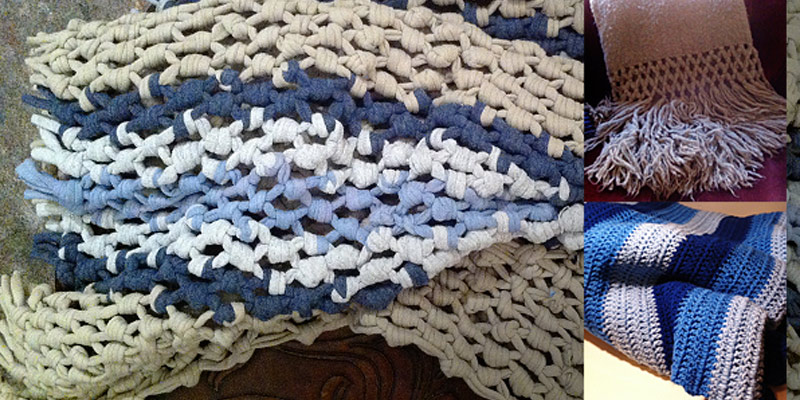
The t-shirt throw project came to be when Bao of Relevé Design was challenged to decorate a living room. The author combined the ideas from a high-end manufacturer and a handcrafted blanket. And the result is a beautiful, eco-friendly throw any living space would welcome!
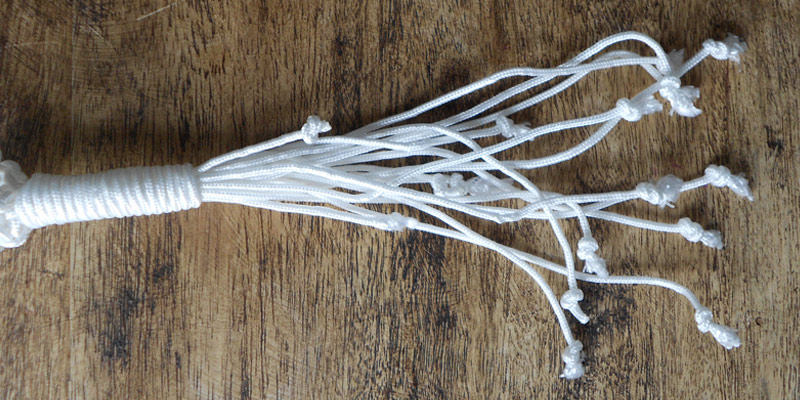
Trash To Couture – DIY Macramé Back Bra
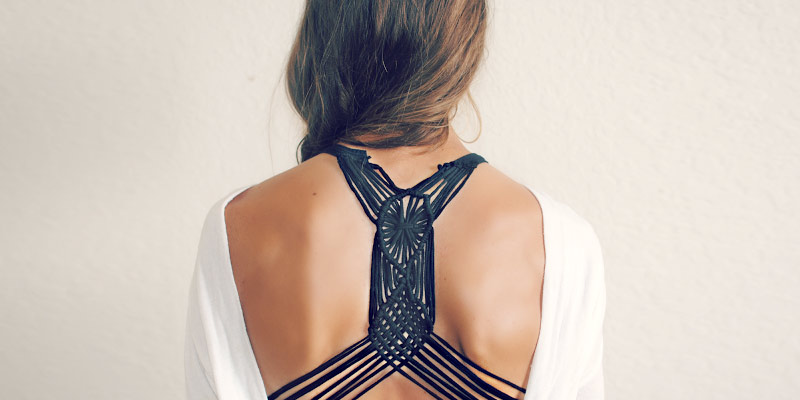
Guys! If your girlfriend loves yoga and open-back blouses, this DIY macramé back bra makes for a stylish top. Getting started with this project is easy. You only need a sports bra along with strips of a t-shirt (or any string). And the best part, you can make the bra sexier and a bit more revealing with a few tweaks.
TUTS+ – Make A Stunning Macramé Hanging Vase
Do you love vertical gardening but hate the boring hanging pots? Let this tutorial Lisa Tilse breathe life to your usual hanging garden. The design of this macramé hanging vase looks intricate, but don’t let that intimidate you. You only need to use 3 basic techniques to finish this project.
6. Sewing
Everyone should learn how to sew – and for a long list of reasons.
To start, decorating and improving your home becomes a breeze if you know how to sew. Need a Holiday-themed decor? Don’t worry. You can whip up a seasonal table runner with ease even with limited sewing skills.
Want a handmade gift for your children? You can easily turn ready-made garments to a personalized kid’s t-shirt with a few stitches.
And let’s not forget:
Sewing helps the environment and even saves you money!
The craft lets you repurpose anything that’s made of fabric. Do you have an old adult shirt you no longer use? Don’t throw it! Turn the shirt, instead, to a little girl’s dress. Have an old sweater lying around? You can transform that to a colorful throw pillow.
If you want to give sewing a serious try, here are the tools you will need:
- Make sure you have the right fabric for the project. Linen, silk, and polyester are some of the most common choices. But cotton is the fabric of our lives, used in socks, underwear, sheets, and more.
- Sewing shears top all-purpose scissors in the fabric construction department. Shears have one larger handle than the other, able to accommodate multiple fingers.
- Grab a seam ripper for unpicking stitches. Without one, correcting sewing mistakes would be a tedious process.
- Always stock up on all-purpose threads whenever you can. Sewing threads form efficient stitches (whether done by hand or using a machine) without breaking.
- And don’t forget to get a couple of straight pins. You’ll need them to holds things in place and define the stitching line.
Sewing was done by hand back in the old days – and it was time-consuming. But thanks to sewing machines, stitching fabric and other materials together is now quick and easy. If you want a guide on how to use a sewing machine, have a look at this tutorial from Dwell On Joy.
Dandee Designs – Beach Towel Tote Bag
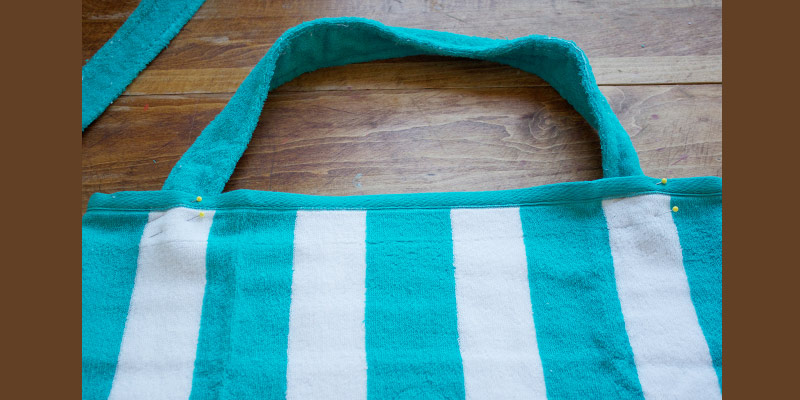
If you have a dozen beach towels lying around and don’t know what to do with them, Danyelle can help! The tutorial shows you how to turn an extra towel to a chic tote bag. You don’t have to be an avid seamstress to complete the project, and it’s simple enough to finish in an hour.
Crazy Little Projects – 10-Minute Laptop Sleeve Tutorial

If you’re like Amber who blogs while on the go, you will love this quick tutorial! You only need enough felt to wrap around your lappy and a couple of velcros for this sleeve tutorial. And in 10 minutes, your laptop will have a new case you can personalize however you want!
Happy Hooligans – How To Make Extra-Large, Reversible, Flannel Receiving Blankets For Baby
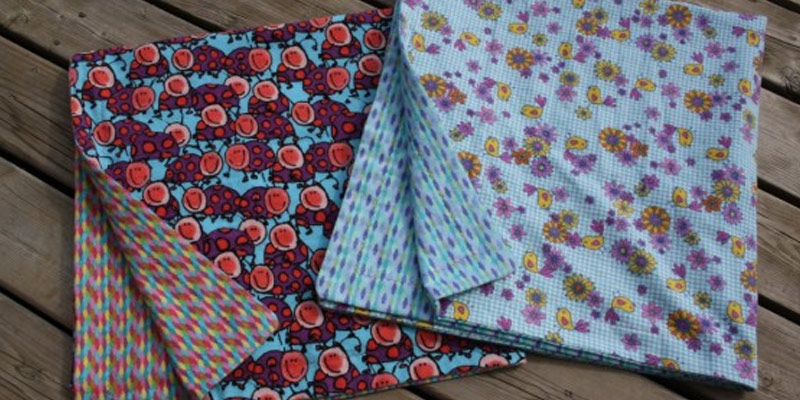
If one of your friends is expecting a baby, this blanket for the little ones will make a great gift! Not only does this DIY baby blanket have a lot of years in it, but it’s also a beginner-friendly project. As long as you can sew a straight line, “You’ll be able to whip this blanket up with no problems at all,” says Jackie of Happy Hooligans.
7. Candle Making

Fun fact:
Candle making was a lucrative and male-dominated trade during the medieval era.
Man was yet to discover electricity and light was – and will always be – a necessity. Just about everyone during ancient times – from parishes, businesses, to families – rely on the chandler (candle maker) for light.
Being a chandler may not be as profitable of a career today. But it’s just as fun!
Think about it:
If you can make candles, you can also manipulate the scent in your home. Whether you long for the invigorating scent of coffee, the sweetness of cinnamon, or masculinity of tobacco, you only need the right ingredients to make the right candle.
And the entire process doesn’t need much:
- Wax is the heart of a candle. And you can choose from beeswax, paraffin, and the new kid on the block – soy wax.
- A large enough wick. Large container candles need wide wicks. Length shouldn’t bother you as you will trim them anyway.
- Fragrance oils to create that pleasing aroma. The sky’s the limit when shopping for scented oils. A quick Google search will show you thousands of choices.
- A double boiler for melting the wax, and containers that can withstand heat.
The entire candle making process has 3 major steps: melting wax, adding scents and colors, and pouring the mix into a container. But there’s more to learn. Read this guide from Felt Magnet for some solid tips and insights from an experienced chandler.
Hello Glow – Make Your House Smell Amazing With DIY French Vanilla Candles
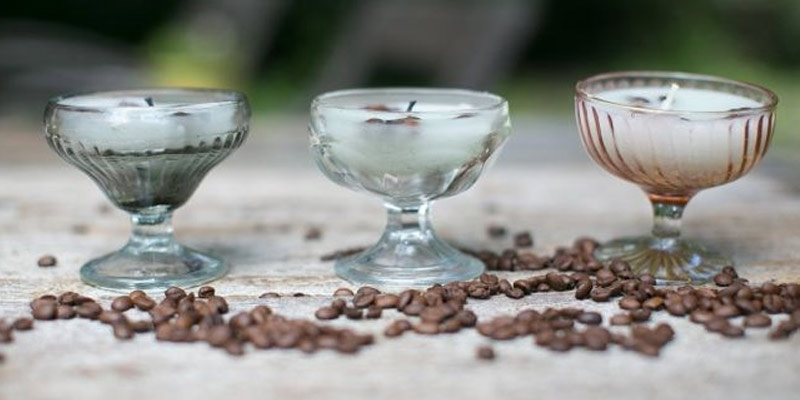
Want to make your house feel warmer and cozier but don’t have a fireplace? No problem! Scented candles can do the job. And in this guide from Stephanie of Hello Glow, you’ll have DIY French vanilla candles that smell so good you’d want to eat them. And they make for a sophisticated table decor, too.
Going Home To Roost – Soy Candle Tutorial + Labels
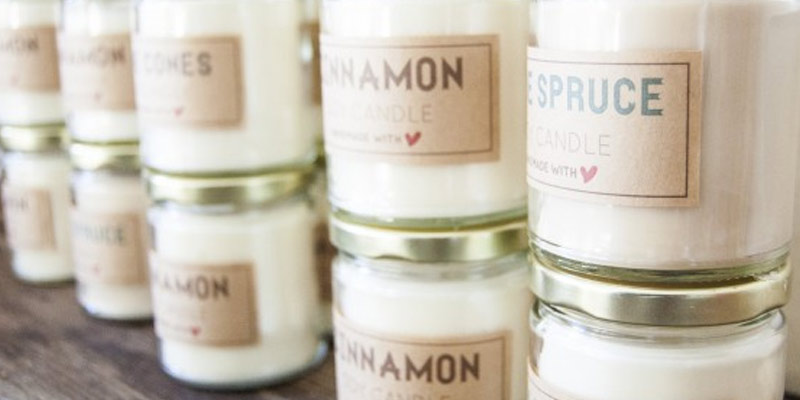
Bonnie is not an expert chandler but pulled off this lovely DIY candle idea anyway! Follow her instructions, and you’ll have candles that smell great, eco-friendly, and burns longer than your average paraffin wax candles. And by the way, Bonnie also included downloadable labels!
Lovely Greens – DIY Wine Bottle Candles

Stop! Don’t throw those empty wine bottles. Tanya of Lovely Greens has a better idea. With this DIY candle project, you can fill your nest with handmade, flickering fragrance. Plus, these candles make a charming handmade gift whatever the season.
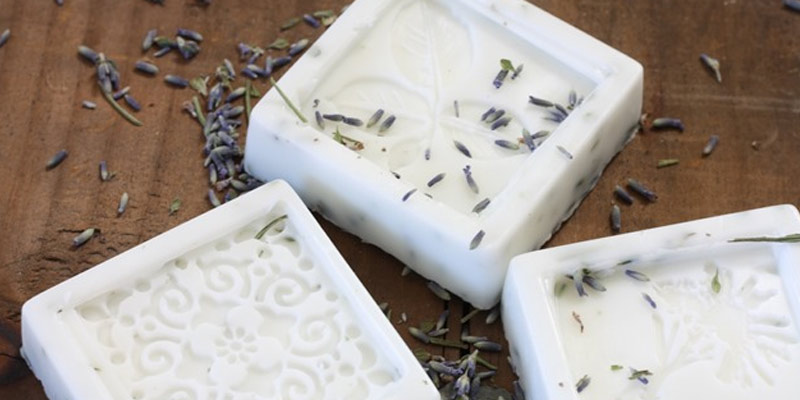
8. Soap Making

Soap making is another ancient art, used by Egyptians as far back as 1550 BC!
Most of today’s soaps are made through a production line at a factory. And while they are easily available, handmade soaps are better for many reasons.
Sure, the latter takes longer to make. But making and owning your soap gives you total control over the ingredients. You can strip out the cheap and not-so-eco-friendly ingredients found in mass-produced soaps, replacing them with healthier options like milk and natural oils.
And even better:
Your handmade soap can provide more than just cleaning!
Want to moisturize your skin better? Add goat’s milk. Can’t resist the smell of walnuts and honey? No problem! Your soap can have those scents with a few tweaks.
Here are the things you’ll need:
- A digital weighing scale for precise measurement of the ingredients and a thermometer as some ingredients will only mix well at a certain temperature.
- Go for stainless steel, glass, or plastic bowls for mixing, and grab a blender as you don’t want to spend an hour stirring soap ingredients together.
- A mold for shaping the soap and freezer paper to line the mold.
Of course, you need ingredients depending on the type of soap you’re making. The DIY soap making ideas below come with complete instructions and list of ingredients. Check them out and get started.
Finding Home Farms – How To Make Homemade Goat’s Milk Soap
Goat’s milk soap can do wonders for you – from moisturizing the skin, removing dead skin cells, to preventing skin cancer. Give Laura and Dana Putnam an hour, and they will show you how to create your own goat’s milk soap (with the scent of your choice) in 5 steps!
A Beautiful Mess – Make Your Own Soap! Grapefruit Mint Poppyseed Bars
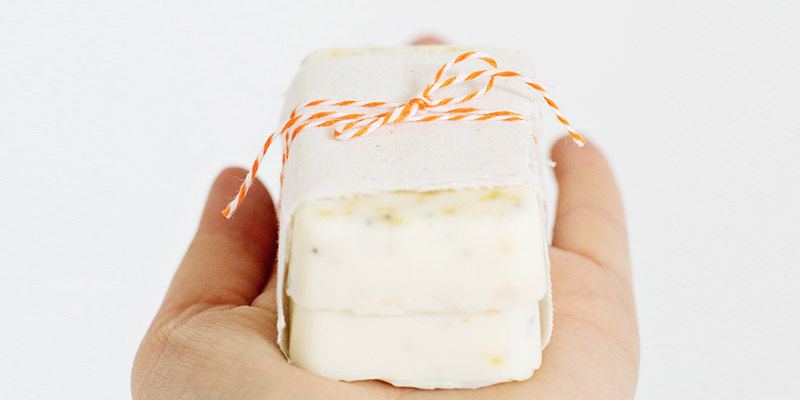
This soap recipe from A Beautiful Mess pampers the skin in more ways than one. The poppy seeds exfoliate the skin, grapefruit oil gives it a nice glow, and we already know what goat’s milk can do. What’s not to like!?
Offbeat And Inspired – Honey-Walnut Milk Soap
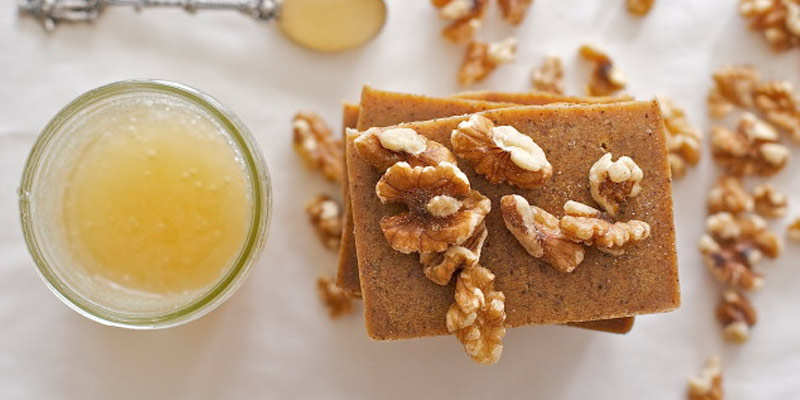
Soap making ideas and inspiration come from unexpected places. In Sarah’s case, the source was her pantry. With honey, walnut, and regular cow’s milk within reach, Sarah got to work, and the result is a homemade soap that moisturizes and smells great – even without adding any scent!
9. Woodworking

Woodworking is a broad craft which transforms plain wood to useful things with the help of tools, encompassing other disciplines like carpentry and joinery.
One doesn’t have to search high and low for excellent examples of woodworking or wood projects. Just look around you! Everything – from the closet in the room, PC table, to kitchen cabinets – are made through woodworking. Learn the craft, and only your imagination will limit your creations!
Now, a woodworker needs the right equipment. And here are the tools you need in your arsenal regardless of skill level:
- The hammer is probably the oldest woodworking tool around. It has a myriad of uses including driving nails, fitting wooden parts, and breaking things apart.
- The chisel, on the other hand, is used for heavy chopping, light paring, and even fine carving. And don’t forget to sharpen a chisel you just bought.
- You’ll need hand planes to smooth rough surfaces and adjust thickness. While a sander can do the same, a good hand plane can deliver better results in less time.
- The handsaw remains an essential woodworking tool – even if powered saws are all the rage. You can use general purpose saws, but they can be too aggressive for delicate woodworking projects.
- Clamps keep everything in place while you work, making them a valuable addition to your toolbox. Without one, using any tools above becomes harder.
Aside from essential tools, a beginner woodworker has to learn individual skills, too, such as drilling holes, cutting wood, and smoothening surfaces. The simple DIY ideas below will give you a hands-on introduction to these must-have skills.
Pallet University – DIY Wall Shelf
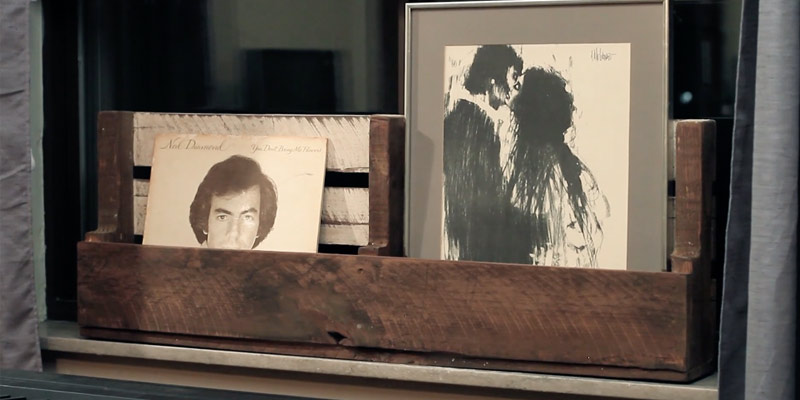
You have your woodworking tools, and they need a place to call home. In this guide from Pallet University, you’ll learn how to build one. This DIY wall shelf takes only an hour to make. The tools and materials needed are easy to find. And in 8 steps, you’ll have a sturdy and rustic wall shelf for storing just about anything.
A Beautiful Mess – Wooden Sofa Sleeve With Cup Holder

This simple yet useful woodworking project will leave you asking, “Why haven’t I thought of that?” If you love reading books and sipping coffee at the sofa (but don’t want to stain the covers), Mandi Johnson shows you how to get around the problem with a DIY wooden sofa sleeve with cup holder.
Instructables – Building Plyometric Boxes
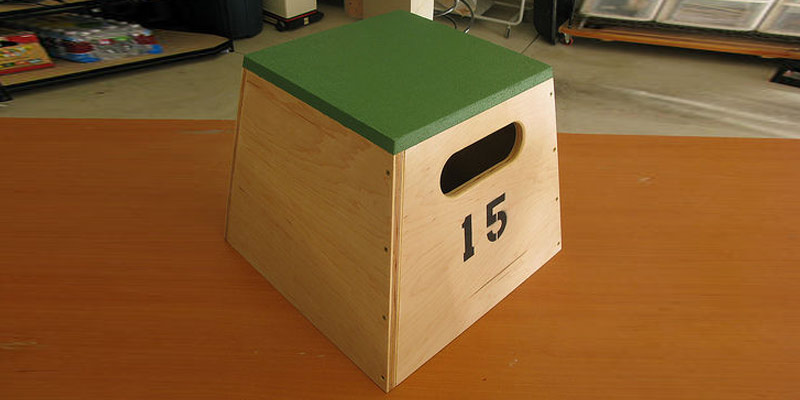
Plyometric boxes are a great workout tool. If you have one at home, you can perform a range of exercises – from box jumps, Bulgarian split squats, to challenging elevated push-ups – without going to the gym. But plyometric boxes are expensive. So why not make one yourself!? This Instructables tutorial from Gabe Billings teaches you how to build your own plyo box in 14 steps.