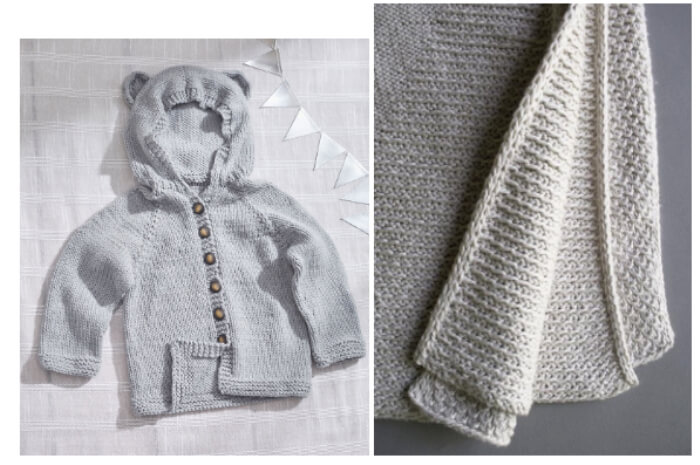
Are you fond of creating your own knitted clothing such as blouses, sweaters, dresses, cardigans, and others? Do you like to start a new fashion trend through your creative knitted fabric designs? Of course, the answer would be yes since you happen to stop by this article.
I know how excited you are in creating your very first knitted piece using a circular knitting machine but the problem is you’re having a hard time figuring out what knitting pattern you should be starting with, right? If that is the case, then you’ve come to the right place!
In this article, we will be discussing four of the most basic circular knitting patterns. There are actually a lot of knitting patterns, but mastering these four will get you through almost all the knitting patterns.
After running through the basics, we will give you more advanced but easy patterns you can use for creating your own stunning knitted clothing designs in your circular knitting machines. So keep on reading to know more!
4 Most Basic Knitting Patterns You Can Stitch In the Round
#1 Stockinette Stitch
The Stockinette stitch, also known as the Stocking stitch, is the most basic type of knitting pattern that is not explained much in many references because it’s mostly included in every crafter’s repertoire. Because it is the most common knitting pattern, you should be able to know this before you carry on knitting patterns on a circular knitting machine.
Characteristics of a Stockinette Stitch
- Creates what is widely known as the “knit fabric”.
- The right or front side of the fabric looks like a series of “V”-patterns.
- The wrong or backside is similar to multiple rows of waving ridges.
There is also what we call the reverse stockinette stitch made from purling the first row and knitting the second one. Through this, the wavy side of the fabric becomes the front.
How to Knit the Stockinette Stitch?
The knitting process starts by doing the knit stitch and then the purling. Unlike the stockinette stitch done with straight needles wherein you need to purl on the wrong side, circular stockinette stitch only requires you to knit on every round such as in the video below.
What Can You Make With a Stockinette Stitch?
You can use stockinette stitch in almost all kinds of knitted fabrics: socks, sweaters, scarves, hats, blankets, and others.
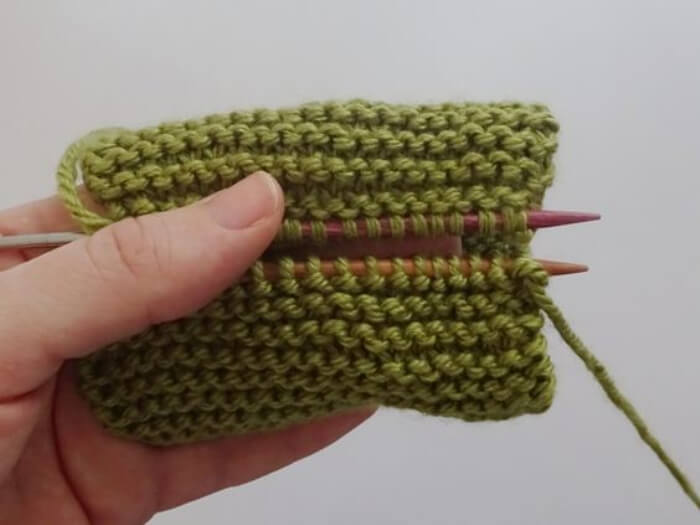
#2 Garter Stitch
This stitch pattern is among the easiest and commonly used stitch pattern for knitted fabrics. Beginners choose this pattern because you don’t have to purl. That is if you are using straight needles. However, the opposite happens when knitting garter stitch in the round.
Characteristics of a Garter Stitch
- Characterized by horizontal ridges produced by the top part of the knitted loops in every row (bumps).
- Right side and wrong side of the stitch look the same.
- The striped texture does not curl.
How to Knit the Garter Stitch
Circular garter stitch is created by knitting the current round and then purling the succeeding one repeatedly. This works because the knit and purl techniques are opposites. The purl ridges give you that bumpy texture which you see in fabrics made with garter stitch. Check out this video on how to do garter stitch in the round:
Alternatively, if you are not fond of doing purls, you can check out this video on how to knit garter stitch without purling:
What Can You Make With a Garter Stitch
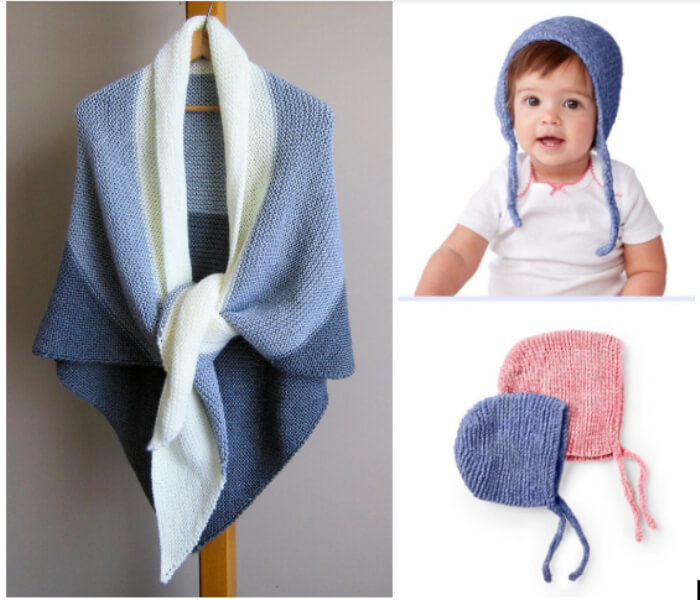
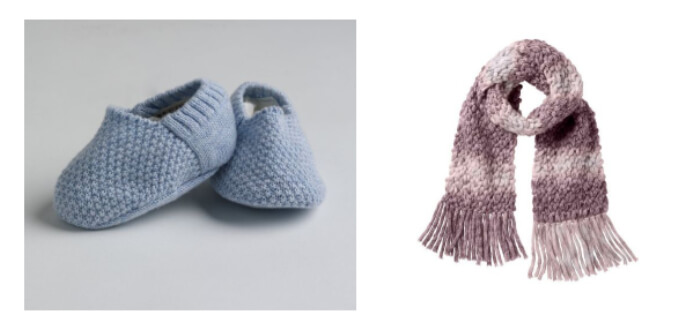
With garter stitch, you can make shawls, hats, sweaters, and even slippers.
#3 Seed Stitch
The seed stitch pattern got its name from how the knitted fabric looks like – a pattern which looks like scattered seeds. This pattern is a little complicated compared to the stockinette and garter stitch patterns but once you have mastered it, you’ll be able to create pieces with interesting textures.
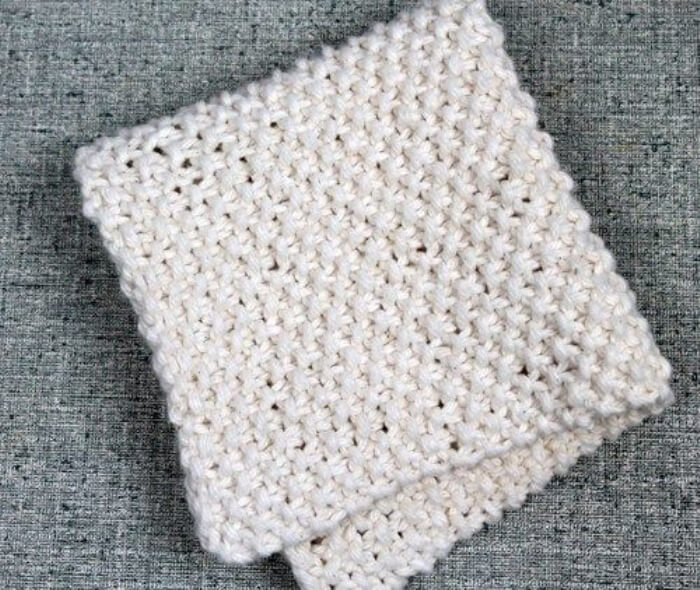
Characteristics of a Seed Stitch
- Consists of horizontally and vertically alternating knit and purl stitches.
- Tiny purl bumps on the knitted fabric.
- Similar patterns on both sides of the fabric.
- Flat-laying stitch ideal for cuff or sweater borders.
How to Knit the Seed Stitch?
The trick in creating the tiny “seeds” on the fabric is by knitting in each purl stitch and purling in each knit stitch of the previous row when creating the next row of stitches. To give you an idea of how the seed stitch is done via circular knitting, check out the video below.
What Can You Make With a Seed Stitch?
Due to the versatility of seed stitch, it can be used in any project from baby hats and booties to neck and hand warmers to washcloths. Since both sides of the knitted fabric have similar looks, seed stitch patterns are ideal for creations where both sides would be visible.
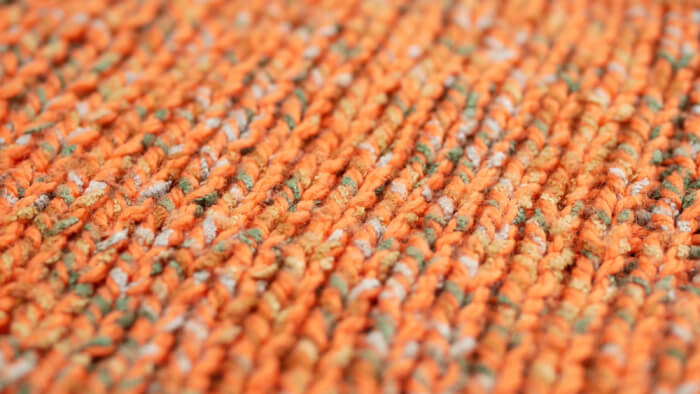
#4 Rib Stitch
Every knitter must know how to knit a basic rib stitch pattern because they will be quite helpful in creating various advanced knitting patterns. Through ribbing, you can create stretchy and form-fitting fabrics.
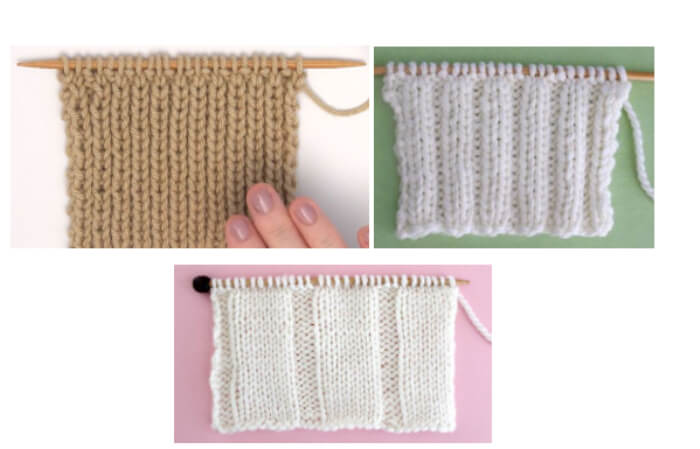
There are three most common types of rib stitch patterns: 1×1, 2×2, and 7×3 rib stitch patterns.
1×1 Rib Stitch
This rib stitch is similar to the Stockinette Stitch. The difference is that it is very stretchable and both sides are identical. So the 1×1 rib stitch is ideal for knitting garments for extra gives especially in knitting hats.
2×2 Rib Stitch
The 2×2 Rib Stitch is thicker compared to the 1×1 stitch so they are great for knitting winter garments. It has repeating patterns of knit and purl stitch techniques for simple and stretchy projects and you can create chunky scarves using it.
7×3 Rib Stitch
This rib stitch pattern is composed of seven wide stockinette stitches separated by three garter ribs so the pattern lies flat but still having a little stretchability.
How to Knit Rib Stitch?
You can read this article on how to knit 1×1 and 2×2 rib stitch patterns. On the other hand, you can go to this article on how to knit a 7×3 Rib Stitch. For a short video on how to knit a rib stitch in a round, you can view the video below:
What Can You Make With a Rib Stitch?
The list of the applications of rib stitch patterns is endless but the most common ones are:
- On cuffs, borders, and neckline on sweaters
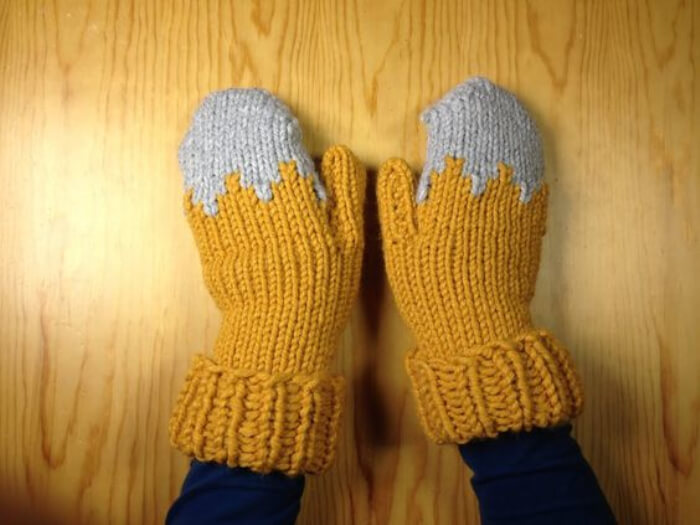
- Cuffs on hats, socks, and mittens
- Waistlines
- Scarves
- Hems
- Bags
If you want more hand-knit patterns for both straight and circular needles, you can check out this link.
Plus 5 More Easy Knitting Patterns For You
The knitting patterns that will be discussed in the following sections are variations and combinations of the four basic knitting patterns mentioned above. So once you have mastered these four, you can easily follow the knitting patterns below.
#1 Beaded Rib Stitch Pattern
This rib stitch pattern is one of the vintage designs composed of ribbed rows. These ribbed rows are separated by alternating small seed stitches that account for the additional texture to the fabric which helps it to lie flat. Moreover, this pattern is not reversible because the fabric’s right side shows the design and does not look the same with the wrong side.
Recommended Usage
The beaded rib stitch is ideal for knitting blankets and scarves because of their thick texture.
How to Knit the Beaded Rib Stitch Pattern
#2 Seeded Rib Stitch Pattern
Characteristic of a Seeded Rib Stitch Pattern
- The ribs create thick textured pieces of knitting.
- Though this pattern is stretchy, fabrics made through seeded rib stitches are still able to hold their shape.
- Also known as the English Mock Rib stitch pattern and is composed of ribbing and seed stitches for spicing up your creations.
- It is reversible which means that when you look at the right and wrong sides of the fabric, they will look identical.
Recommended Usage
The seeded rib stitches do not pull in that much compared to the regular ribs so they are not ideal for knitting cuffs on sleeves. However, they will work well for allover stitch patterns or on some edgings where tightness is not needed. You can use the seeded rib stitch pattern for knitting eye-catching pieces such as tea towels, dishcloths, hats, scarves, cardigans, and pullovers. This pattern also looks great on guys.
How to Knit the Seeded Rib Stitch Pattern
#3 Andalusian Stitch Pattern
The Andalusian stitch pattern is an update of the Stockinette stitch pattern and was named after the Andalusia community in Southern Spain.
Characteristics of Andalusian Stitch Pattern
- Not a reversible stitch pattern but the wrong side still has a clean look which you would probably not mind to be visible.
- Similar to a Stockinette stitch pattern but with only one row of ribs (knit one and purl one) which turns the look of the regular Stockinette stitch to a grid pattern.
Recommended Usage
You can pretty much use the Andalusian pattern on anything just like where you would use the Stockinette pattern such as sweaters but they would perfectly fit knitted darling baby blankets in a single solid color.
How to Knit the Andalusian Stitch Pattern
#4 Chevron Seed Stitch
Characteristics of Chevron Seed Stitch Pattern
- Composed of textured zigzag patterns
- Formed by combining alternating knit and purl patterns similar to the seed stitch.
- Not a reversible pattern.
- The front/right side has the zigzag patterns and the back/wrong side has an inverted texture.
Recommended Usage
Perfect for knitting chunky scarves or on the ends of scarves, cuff edges, lapels, or pockets. If you combine multiple colors, you can create amazing Navajo-inspired designs such as in the image below.
How to Knit the Chevron Seed Stitch Pattern
#5 Tile Squares Stitch
The tile squares stitch pattern is composed of Stockinette blocks vertically separated by a seed stitch rib and a horizontal purl ridge.
Characteristics of Tile Squares Stitch Pattern
- Each stockinette block is composed of 5 rows and 4 stitches.
- The blocks rest atop ridges of textured stitches or purls and delineated by a row of seed stitch rib.
- Not a reversible pattern. The right side displays the pattern design while the wrong side does not.
Recommended Usage
Due to the stockinette blocks composing the tile squares stitch pattern, it is ideal for knitting up pillows and blankets.
How to Knit the Tile Squares Stitch Pattern
All of the knitting patterns we have discussed in this article are for hand knitting but you can also do them on your own circular knitting machines. But of course, you need to know how to convert these hand-knit patterns into knitting machine patterns before you can start knitting them on your machines.
Conclusion
The pattern that you will choose for the knitting process will greatly affect the overall look of your resulting piece. Different patterns will give out different feels on your creation and it is up to you to figure out which pattern will best suit the type of clothing you are intending to knit. Feel free to experiment on the ten circular knitting machine patterns we have laid out for you in this article and unleash the creativity inside you.
Want to know more about knitting and circular knitting machines? Do not hesitate to browse through our other articles which are meant to guide you through your whole knitting journey. Whether you are a beginner or an expert in the field, you will surely learn more new things in our articles.